Notification Settings
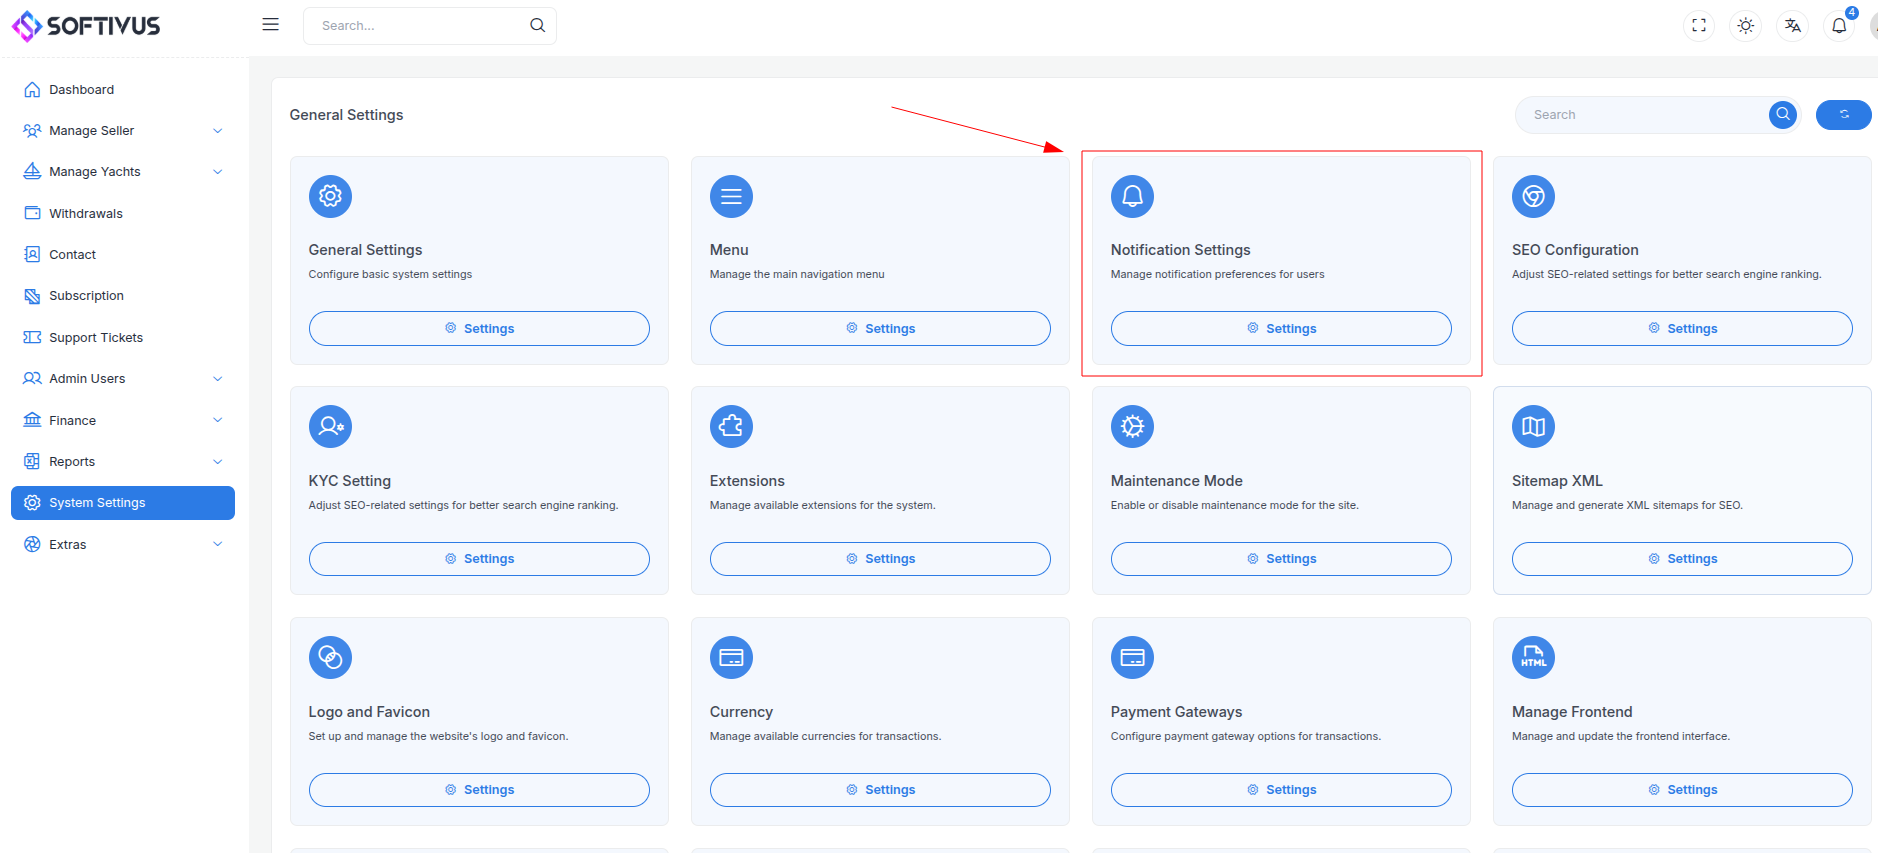
Go the system setting an select Notification Settings on the list view the click, it will redirect to notification settings page.
Notification Settings
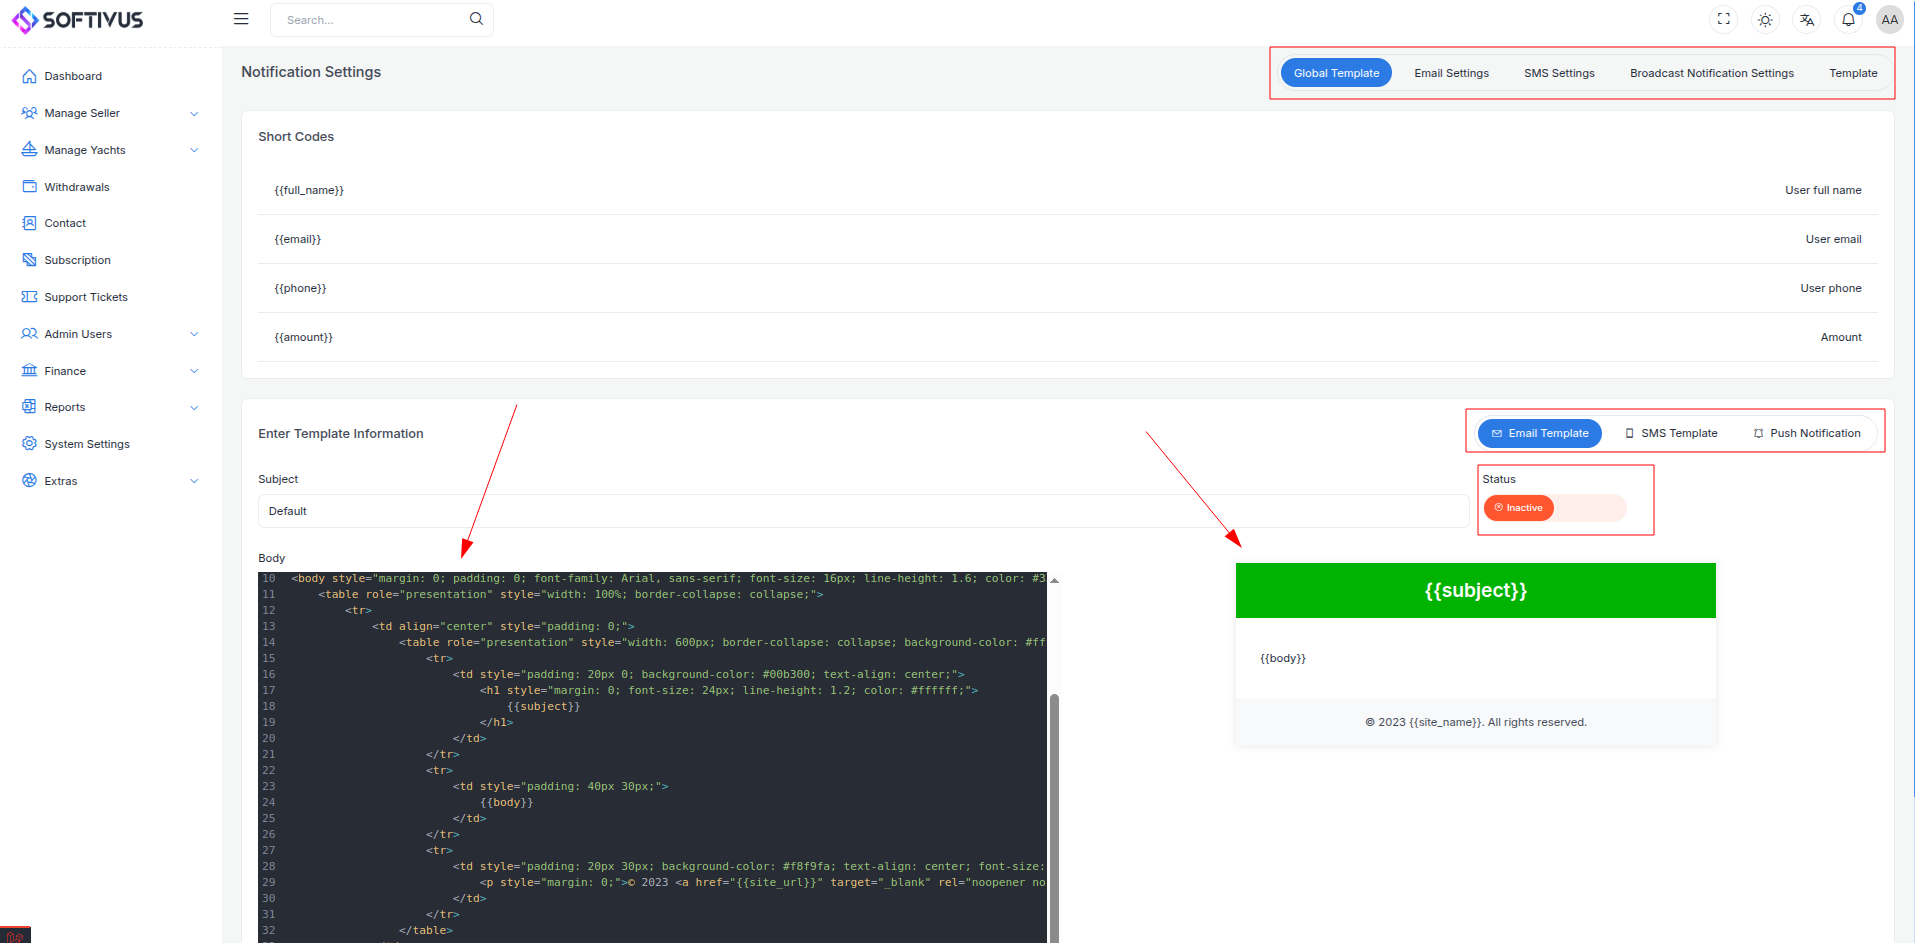
In this page you can see tab button on the top of right corner,
- Global Template: This is the global template for all the notifications.
- Email Settings: setup email credentials for email notifications.
- SMS Settings: setup SMS credentials for SMS notifications.
- Push Notification Settings: setup push notification credentials for push notifications.
- Templates: This is the templates for all the notifications.
Global Template
On the middle have default Short Code where you can see all the short codes that can be used in the templates.
On the bottom have template information for different notification types.
This is a global template for all the notifications, you can edit this template on the embedded editor and can seed live preview on the right side.
Email Settings
In this page you can see email settings for email notifications.
You can select a mail driver to send email notifications, then update the required credentials for the mail driver.
We you using two type of drivers,
- SMTP: setup SMTP credentials for email notifications.
- Mailgun: setup Mailgun credentials for email notifications.
After that you can check your configuration working or not using Send Test Mail button on the top of right corner.

SMS Settings
In this page you can see SMS settings for SMS notifications.
You can select a SMS driver to send SMS notifications, then update the required credentials for the SMS driver.
We you using two type of drivers,
- Twilio: setup Twilio credentials for SMS notifications.
- Nexmo: setup Nexmo credentials for SMS notifications.
Twilio
Twilio is a popular service for sending SMS notifications. To use it, you’ll need to set up an account and grab your credentials. Here’s how to do it:
Step 1: Sign Up for a Twilio Account
- Go to the Twilio website.
- Click Sign Up (usually in the top-right corner).
- Fill in your details: email, password, and phone number.
- Verify your email and phone number when prompted.
Step 2: Get Your Twilio Phone Number
- After signing up, log in to your Twilio dashboard.
- You’ll be asked to start a trial account. Follow the prompts to set it up.
- Twilio will ask you to pick a phone number:
- Choose a number from the available options (it’s free for trial).
- This will be the number used to send SMS notifications.
Step 3: Find Your Twilio Credentials
- Once you’re in the Twilio dashboard, look at the main page (the Console Home).
- You’ll see two key pieces of info:
- Account SID: A long string starting with
AC(e.g.,ACxxxxxxxxxxxxxxxxxxxxxxxxxxxxxx). - Auth Token: Another long string (e.g.,
xxxxxxxxxxxxxxxxxxxxxxxxxxxxxxxx).
- Account SID: A long string starting with
- Copy these somewhere safe—they’re your credentials!
Step 4: Set Up Your Credentials
To use Twilio for SMS notifications, you’ll need:
- Account SID: From the dashboard (Step 3).
- Auth Token: From the dashboard (Step 3).
- Twilio Phone Number: The number you picked in Step 2 (e.g.,
+12345678901).
Example for Your Code
In your project, add these credentials like this (example in a config file):
TWILIO_ACCOUNT_SID=ACxxxxxxxxxxxxxxxxxxxxxxxxxxxxxx
TWILIO_AUTH_TOKEN=xxxxxxxxxxxxxxxxxxxxxxxxxxxxxxxx
TWILIO_PHONE_NUMBER=+12345678901
Nexmo
Nexmo, now part of Vonage, is another great service for sending SMS notifications. To use it, you’ll need to set up an account and retrieve your credentials. Here’s how to do it:
Step 1: Sign Up for a Vonage Account
- Go to the Vonage API website (Nexmo is under Vonage now).
- Click Sign Up or Try it Free (usually in the top-right corner).
- Enter your details: email, password, and phone number.
- Verify your email when prompted.
Step 2: Access the Dashboard
- After signing up, log in to your Vonage dashboard at dashboard.nexmo.com.
- You’ll land on the main page where you can manage your account.
Step 3: Get Your Nexmo API Credentials
- In the dashboard, look for the API Settings or Getting Started section (usually on the left sidebar or top menu).
- You’ll see two key pieces of info:
- API Key: A string like
abc12345. - API Secret: Another string like
Xyz7890123456.
- API Key: A string like
- Copy these somewhere secure—these are your credentials!
Step 4: Get a Virtual Phone Number
- In the dashboard, go to Numbers or Buy Numbers (usually in the sidebar).
- Search for a virtual phone number:
- Pick a country and select a number (trial accounts get free or cheap options).
- Buy or rent the number (e.g.,
+12345678901).
- This will be the number used to send SMS notifications.
Step 5: Set Up Your Credentials
To use Nexmo for SMS notifications, you’ll need:
- API Key: From Step 3.
- API Secret: From Step 3.
- Nexmo Phone Number: The virtual number from Step 4 (e.g.,
+12345678901).
Example for Your Code
In your project, add these credentials like this (example in a config file):
NEXMO_API_KEY=abc12345
NEXMO_API_SECRET=Xyz7890123456
NEXMO_PHONE_NUMBER=+12345678901
After that you can check your configuration working or not using Send Test SMS button on the top of right corner.

Push Notification Settings
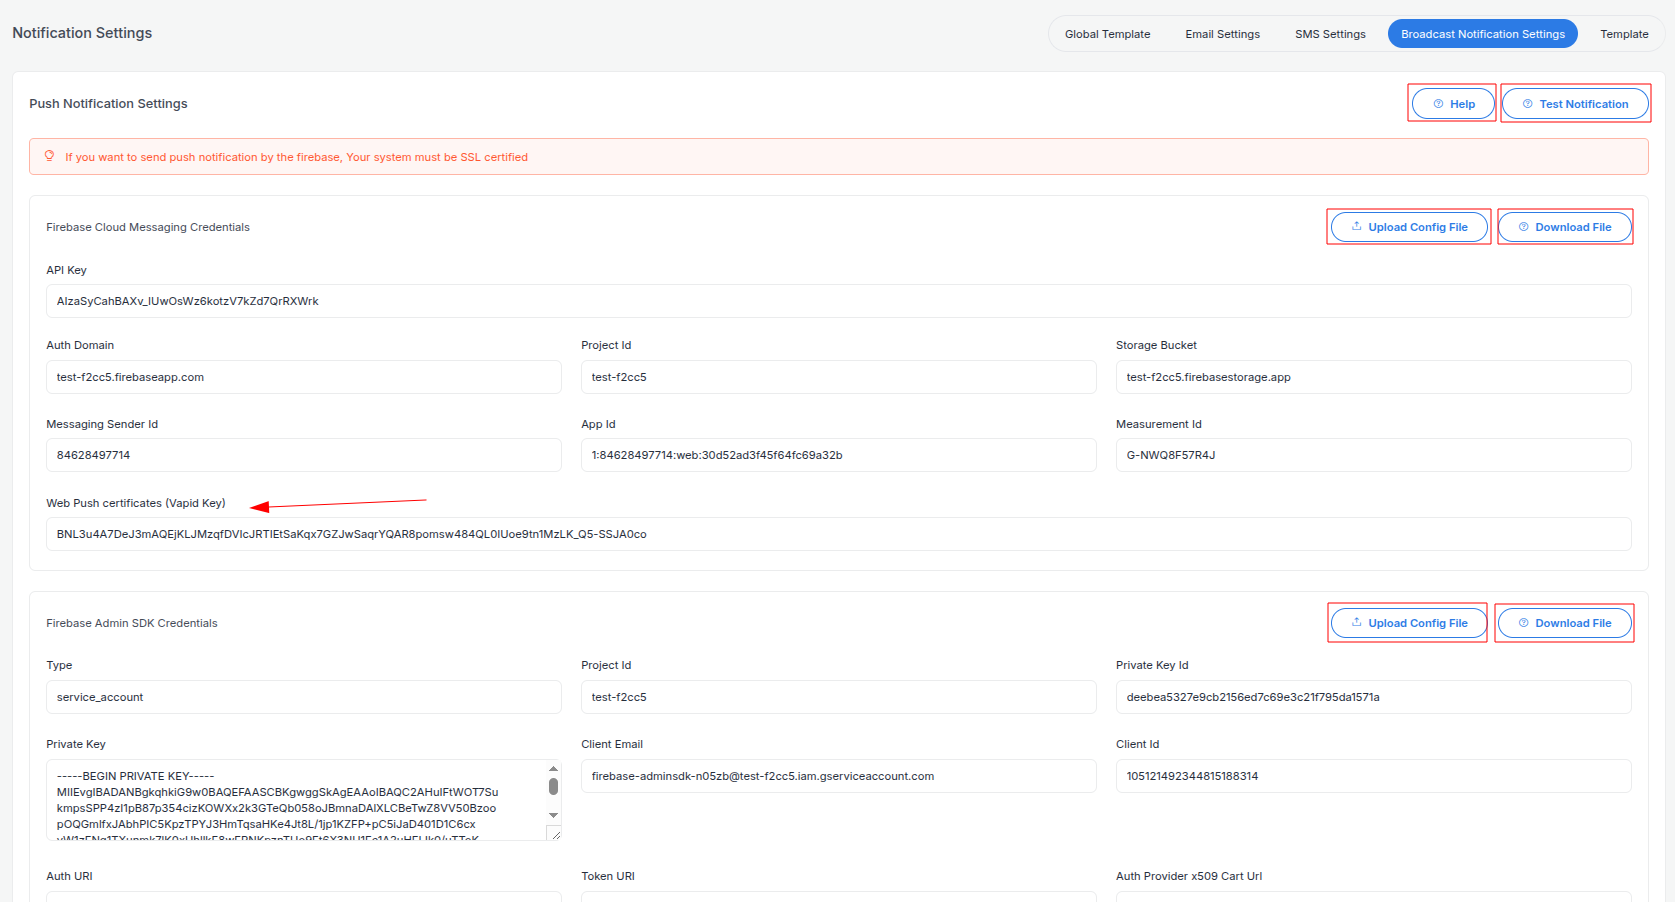
This page provides instructions to easily obtain credentials for Firebase Cloud Messaging (FCM) and Firebase Admin SDK, which are essential for setting up push notifications in your app. We'll also touch on the Web Push Certificate (VAPID) for web notifications.
Firebase Cloud Messaging (FCM) Credentials
FCM credentials are used to send push notifications to your app users. Here’s how to get them quickly:
Step 1: Access the Cloud Messaging Page
- In the Firebase Console, go to Project Settings.
- Click the General tab.
Step 2: Get Your FCM Credentials
- Scroll down to Apps.
- create a new app if you don’t have one already.
- now you can see the firebase configuration for your app.
example:
    // For Firebase JS SDK v7.20.0 and later, measurementId is optional
    const firebaseConfig = {
    apiKey: "AIzaS...",
    authDomain: "test...",
    databaseURL: "https://test...",
    projectId: "test...",
    storageBucket: "test...",
    messagingSenderId: "846...",
    appId: "1:84...",
    measurementId: "G-..."
    };
Web Push Certificate (VAPID)
VAPID keys are optional for web push notifications. Here’s how to get them:
Step 1: Go to Cloud Messaging Settings
- In the same Cloud Messaging tab (from FCM steps above), scroll down to Web Push Certificates.
Step 2: Generate or Copy VAPID Keys
- If no key exists, click Generate Key Pair to create a new one.
- You’ll see a Public Key (long string). Copy it.
- The private key is managed by Firebase—you don’t need to handle it manually.
Step 3: Use in Your Web App
- Add the Public Key to your dashboard
Web Push certificates (Vapid Key).
Firebase Admin SDK Credentials
Admin SDK credentials (a JSON file) are used for server-side tasks, like sending push notifications from your backend. Here’s how to get them:
Step 1: Access the Service Accounts Page
- In the Firebase Console, go to Project Settings.
- Click the Service Accounts tab.
Step 2: Generate the JSON Key
- Scroll to the Firebase Admin SDK section.
- Click Generate New Private Key (or "Generate Key" if it’s your first time).
- A
.jsonfile (e.g.,your-project-firebase-adminsdk-abc123.json) will download automatically. - upload this json file on our dashboard or update credentials one by one.
Test Notification
After all credentials updated then test you push notification by click Text Notification button on the top of right corner.
Templates
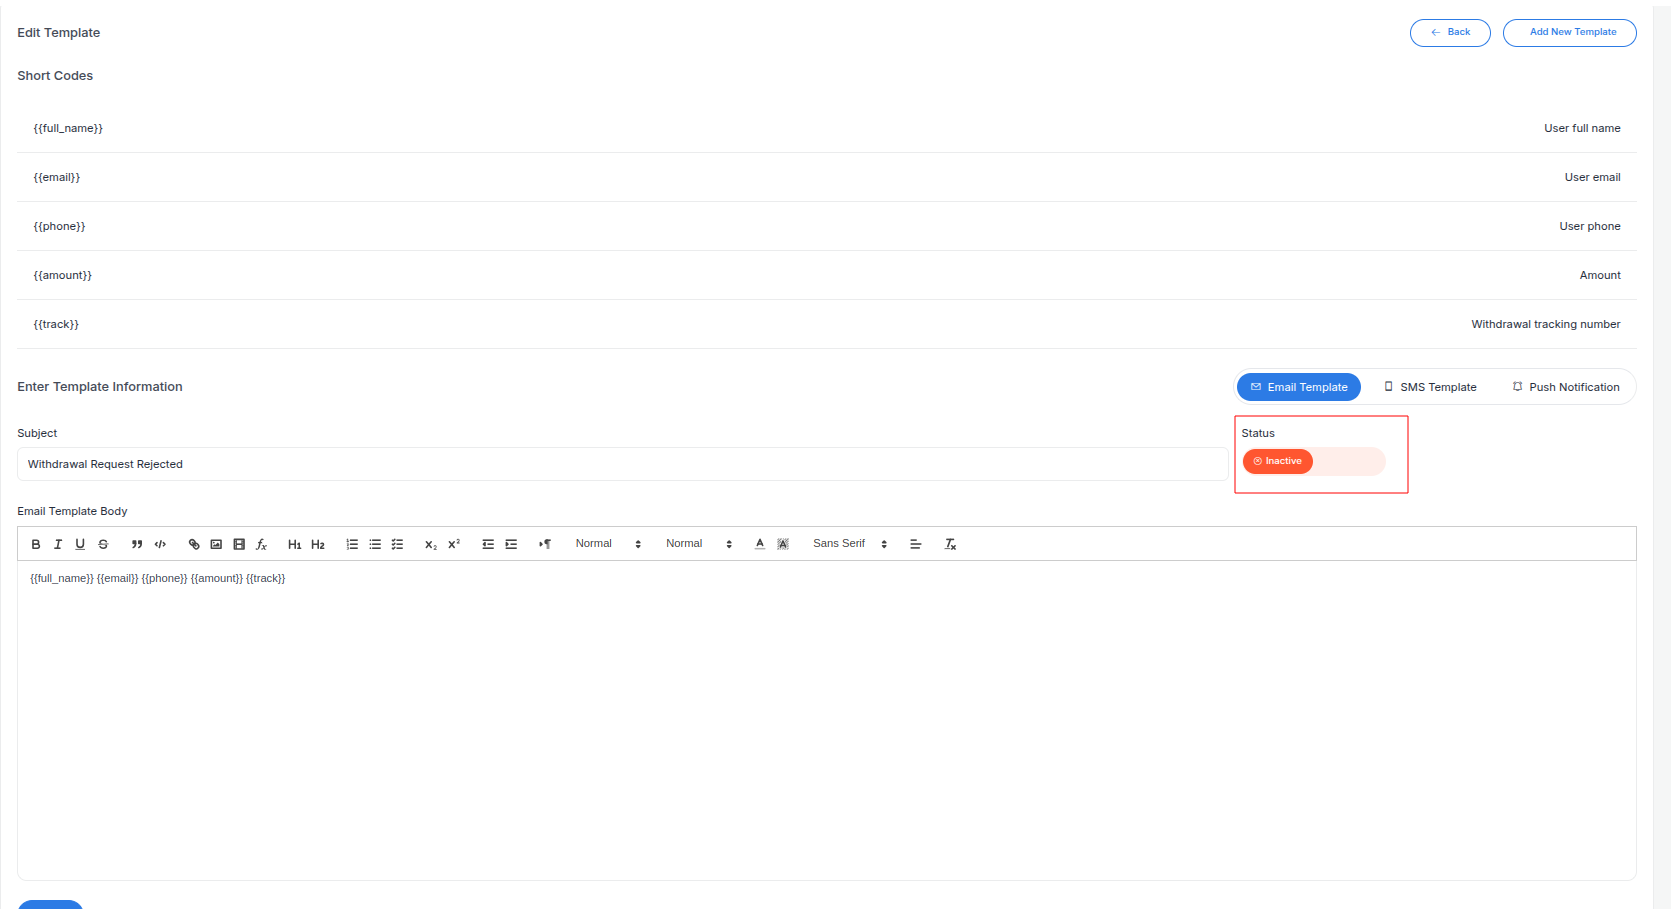
In this page you have prebuilt notification template for different types Email, Sms and Push. In list table on every row have action button with Edit and Delete button.
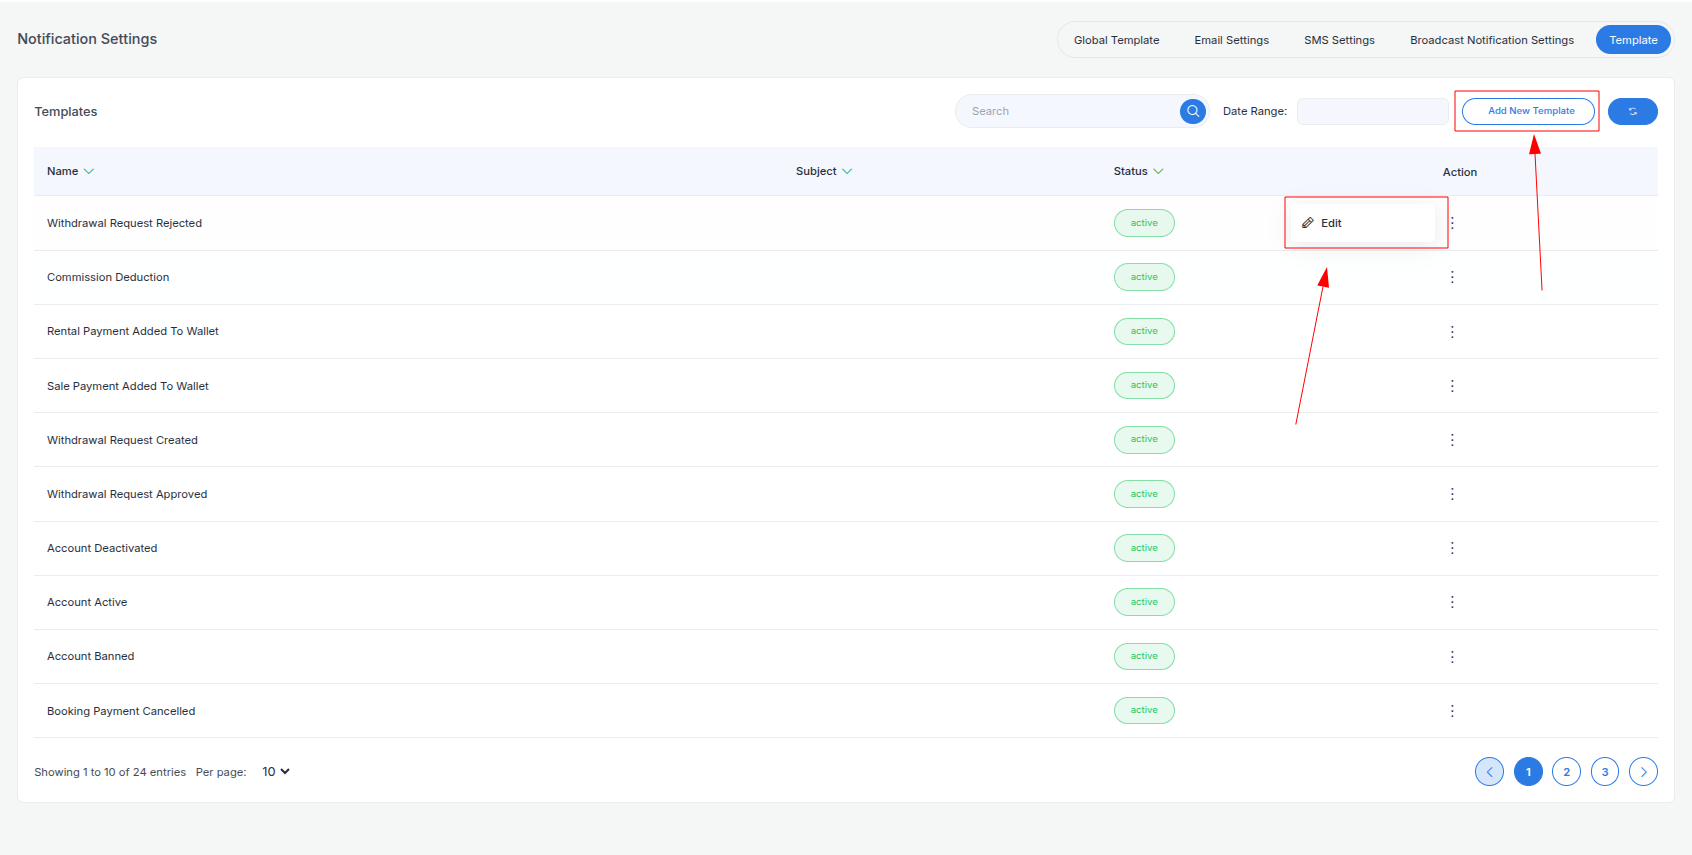
On the top of right corner have Add New Template button that you can create new template.
